What is the searing technique you use when grilling steaks? You are the kind of outdoor cook that knows precisely what you want and how to achieve it. You may not be a competition griller or meat smoker but you have watched enough television shows featuring outdoor cooking or you have watched several YouTube videos to learn various grilling and barbecuing techniques and that perfectly grilled rib-eye steak is on the horizon.
Now it is time to ensure everything is in place for the perfect grilling experience. One of the first things to accomplish is the selection of the meat you will be grilling. Selecting the ideal piece of meat can be almost as rewarding as the actual cook.
Once you have chosen your meat, you will want to let it rest at room temperature for at least one-half hour. Blot the meat to dry the surfaces prior to grilling and add your preferred seasonings.
Assemble your grilling accessories and fire up the grill. For thicker cuts of meat, you will want to set up a 2-zone cooking area with and area of direct heat for searing and area for indirect low and slow grilling.
Grilling Technique – The Searing Technique
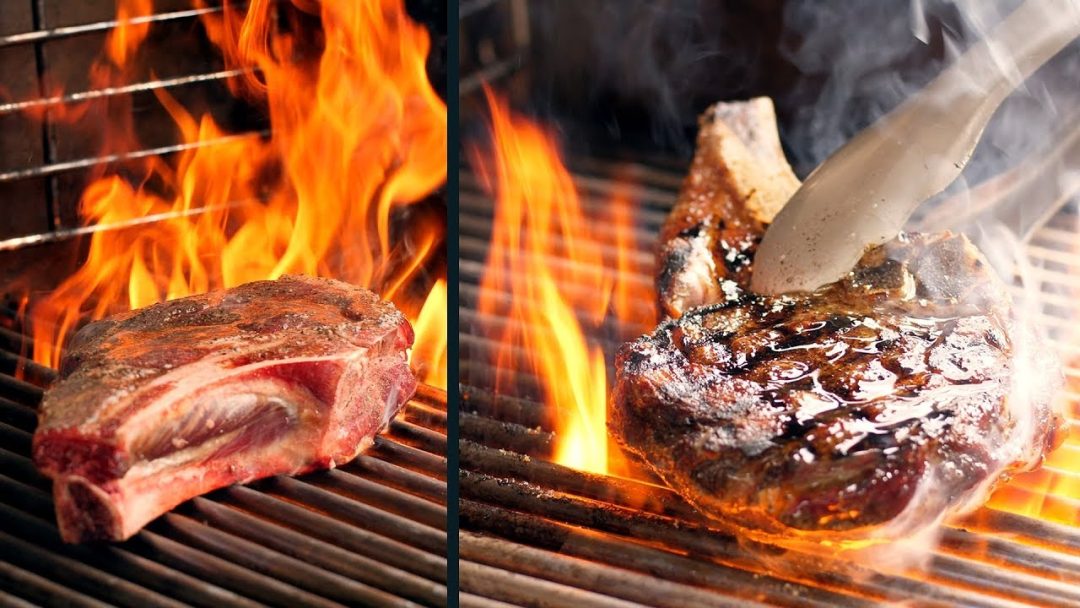
One of the more popular techniques for grilling steaks is to get your grill screaming hot then throw the steaks on for a couple of minutes on each side. This is what is called searing the steak. Having seared the sides, you then move the steak to a cooler part of the grill to let the inside of the meat reach your desired temperature of doneness.
With the above searing method, the result is a steak with a nice searing related char on the outside. Just below this layer is another layer that is usually gray or brown in color. This is because, with the high heat searing, the steak has started cooking from the outside in and depending upon the thickness of the steak will exhibit various degrees of doneness. With this type of searing the outer edges, the charred sides, maybe overcooked while the inner portion of the steak can be medium-rare.
The above method of searing works for thin steaks or thin cuts of meat (less than 1 ½ inch). The searing hot temperature puts that nice finish on the meat while cooking the interior of the meat to your desired temperature quickly. However, you might wish to try another technique for those thicker cuts of meat.
Grilling Technique – The Reverse Sear
The above method of searing steaks results in some fantastic steaks. However, another technique that could possibly give you a better steak is the reverse sear.
With this method, you first cook your meat low and slow, with the grate temperature sitting between 225 degrees and 275 degrees. This allows the meat to cook
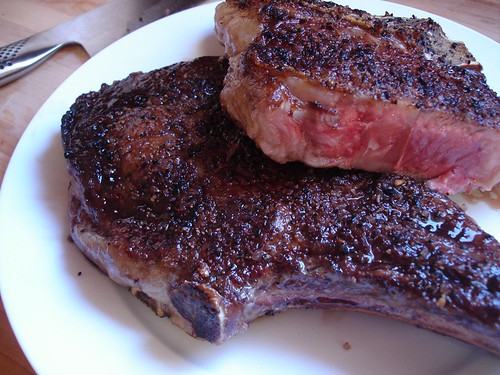
more uniformly. While the meat is slow cooking, you will need to flip it a couple of times to ensure even cooking. When flipping, it is best to use tongs rather than a meat fork to avoid releasing juices. When the internal meat temperature reaches 115 degrees at the center, for medium-rare, or about 10 – 15 degrees below the target temperature, you will move it to the scorching hot heat for the final sear. Continue flipping the meat with a pair of tongs to achieve that perfect sear of a piece of meat that has a uniform brown surface with a bit of charring around the fatty edges.
Grill marks look nice on that piece of steak, but for that perfect steak, you want the entire surfaces to be the same color as the grill marks would have been. Where those grill marks are evident is where the meat has cooked just a little bit more than the rest, resulting in an uneven cook on the surface.
Whichever technique you choose to use, with proper care you will end up with a very exquisite steak.
The reverse sear will take longer to cook since you are cooking the whole steak more evenly at a lower temperature.
Watch the video below with Chef Jamie Purviance, author of Weber’s Way to Grill, participating in a searing challenge using both techniques.